Looking to dominate the CS2 Vertigo map? Whether you’re playing Premier or just grinding ranked, knowing the Vertigo callouts in CS2 is a must. This vertical map has a unique layout filled with tight corridors, open ledges, and layered levels that can confuse even experienced players if they don’t know the right callouts.
In this guide, we’ll cover all essential CS2 Vertigo callouts, broken down by areas — A Site, B Site, and Mid — to help you and your team communicate effectively and win more rounds.
Why Learning Vertigo Callouts in CS2 is Important
The CS2 Vertigo map is unlike any other in the pool. With its multi-layered structure and elevated bombsites, it can quickly become chaotic without clear communication. Mastering callouts helps with:
- Fast callouts during enemy pushes
- Coordinated site executions
- Accurate rotations
- Efficient utility usage
Let’s dive into each part of the Vertigo map and learn the most important callouts you need to know.
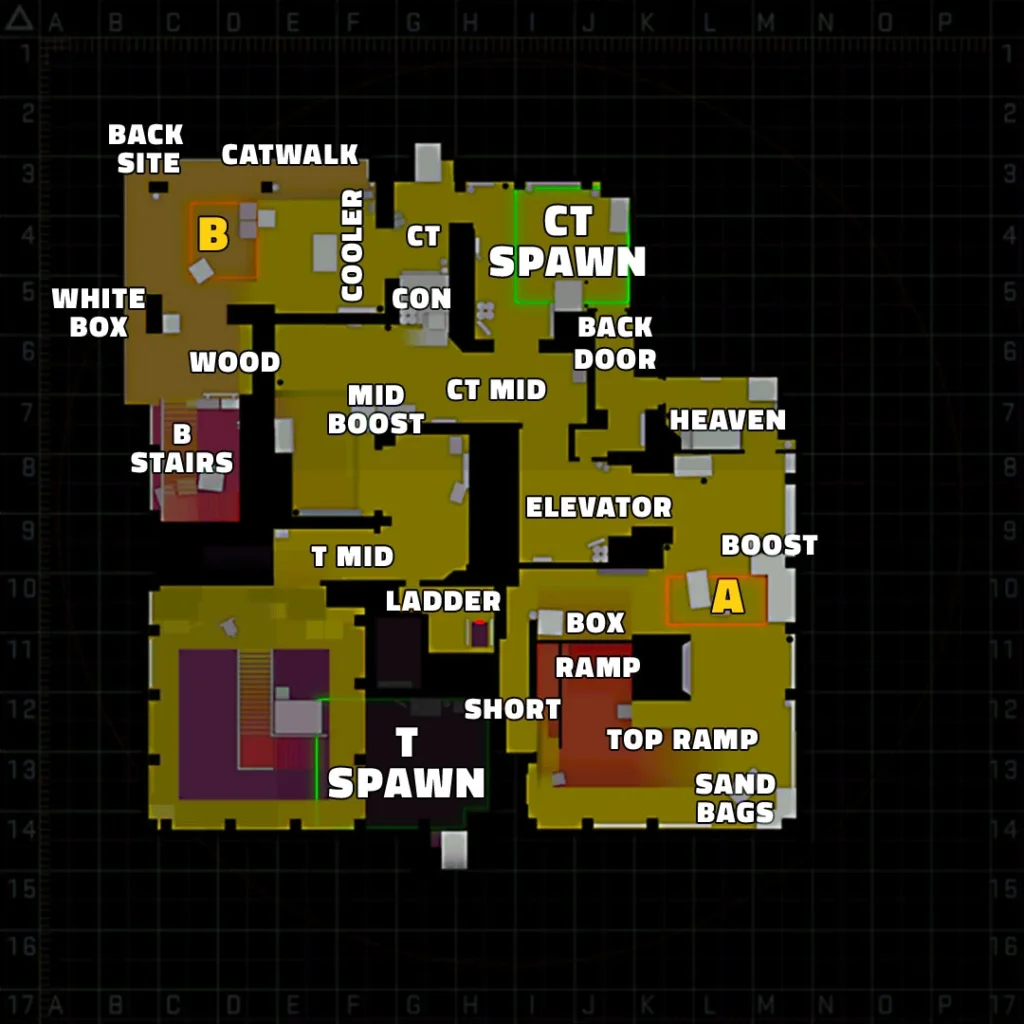
A Site Callouts on CS2 Vertigo
A Ramp
- Ramp: The long slope attackers use to approach A Site.
- Sandbags: A popular defender position on the right side of Ramp. Can be mollied or cleared with utility.
- Bottom Ramp: The starting point of the T-side push towards A.
- Top Ramp: Just before entering A Site, where Ts often throw utility.
Scaffolding (Scaff)
- Located to the right of Ramp.
- Offers a sneaky entry point or rotation path for Ts.
- Can be smoked off by CTs to delay pushes.
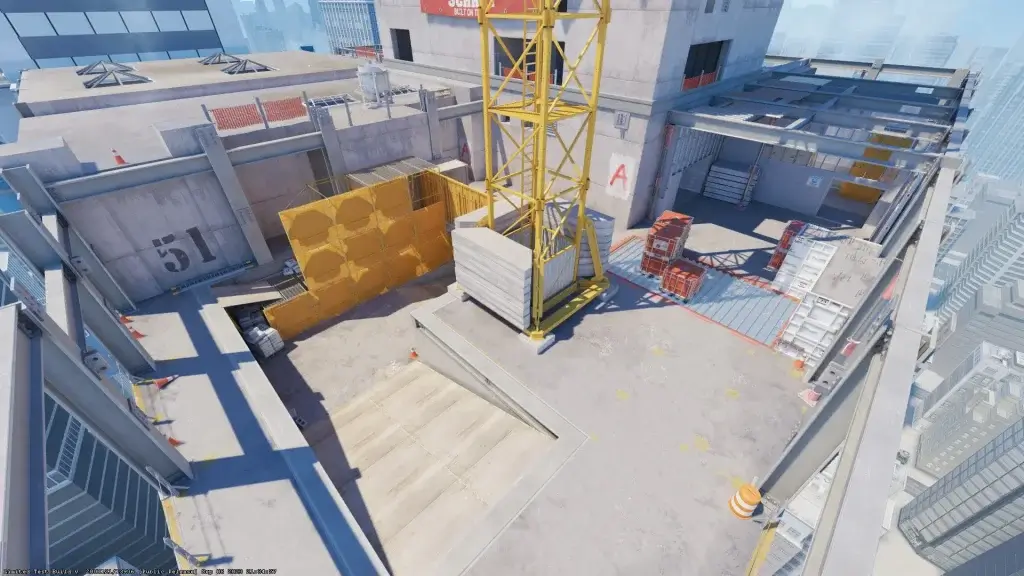
A Site
- Default Plant: Common plant spot behind the metal boxes.
- Generator: Metal structure at the back of the site, often used for cover.
- Wooden Panel: A wall on the site’s edge where players can play off-angle.
- Crane: Metal crane structure visible from Ramp. Provides limited cover.
- Short A: The path between Ramp and Site. Often used to boost or hold mid-range angles.
A Heaven
- Elevated position above A Site.
- Accessible by ladder near Elevator.
- Powerful spot for defenders to hold the site from a distance.
B Site Callouts on CS2 Vertigo
B Stairs
- Bottom Stairs: Start of T-side push towards B.
- Top Stairs: End of the stair climb, opens into B ramp and construction.
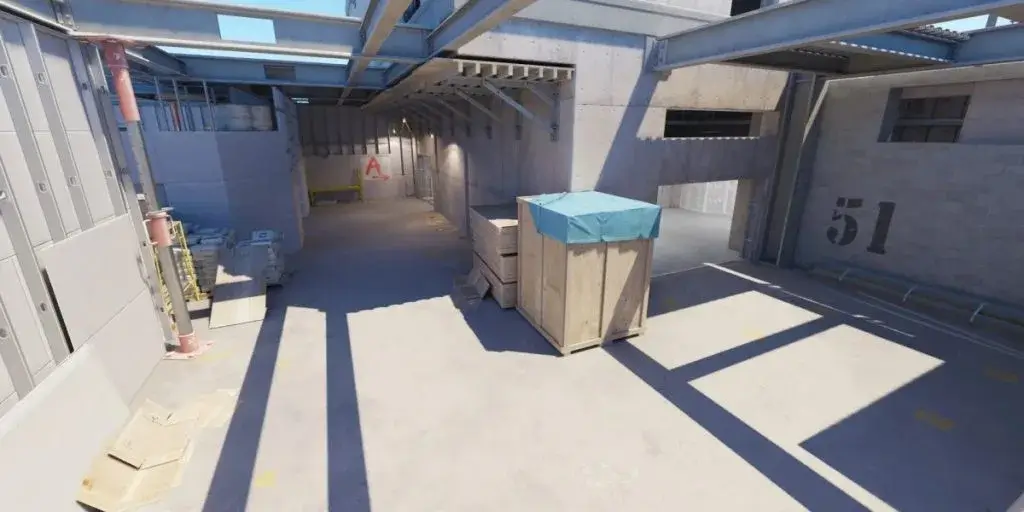
Construction (or “Cons”)
- A connector area between Mid and B Site.
- Gives CTs fast rotate access.
- Common duel zone between Ts rotating through Mid and CTs defending B.
B Ramp
- Long corridor Ts take to enter B Site.
- Can be spammed or held with AWP/Scout.
- Watch for boosts behind railings.
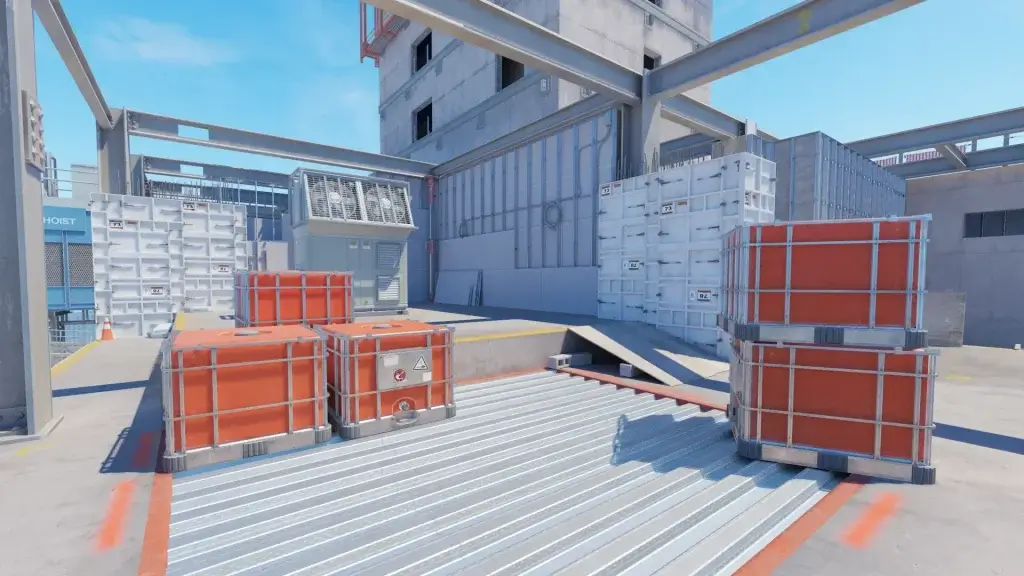
B Site
- Default Plant: Near the construction entrance.
- Boxes: Multiple boxes scattered across site offering partial cover.
- Yellow: A large yellow container at the back of the site; often used to hold angles or hide.
- Headshot: A corner spot where only a player’s head peeks when crouched.
Catwalk (Cat)
- Thin walkway leading to the B site from Mid.
- Offers fast flank or rotate opportunities.
Mid Callouts on CS2 Vertigo
T Mid
- Starting mid control area for Ts.
- Leads to Ladder Room or to Construction.
Mid Ramp
- Slight incline that leads towards Mid control.
- Watch for CTs holding aggressive peeks here.
Ladder Room
- Small enclosed area connecting Mid to A Site.
- Accessible by a ladder. Dangerous and often smoked.
Window
- Open window in Mid that provides vision or jump spots.
- Ts can peek or jump through to pressure Construction.
Elevator
- CT side connector that leads to A Site and Heaven.
- Used for quick CT rotations.
- Can be held to delay flanks.
CT Spawn & Rotations
CT Spawn
- Located between A and B.
- Allows quick rotation to either site.
Snipers Nest
- Elevated position near CT spawn.
- Offers view over Mid or part of A.
T Spawn & Approaches
T Spawn
- Spawn area for Terrorists.
- Provides split options to Ramp, B Stairs, or Mid.
Boost Spot (T side)
- Located outside T spawn near Mid.
- Often used to gain early mid control.
Bonus Tips for Mastering the CS2 Vertigo Map
- Sound is critical: Because the map is stacked vertically, footstep audio gives away enemy positions clearly.
- Use verticality: Take advantage of angles like Heaven, Ladder Room, and Scaffold.
- Control Mid: Mid pressure can split defenders and make site takes easier.
- Practice smokes: Vertigo has many one-way smokes, boost spots, and angles that benefit from good utility.
Final Thoughts
The Vertigo callouts in CS2 are crucial if you want to climb ranks and win consistently. With its vertical design and tight spaces, communication and coordination are everything. Although it’s still a question either vertigo is CT or T sided, Keep practicing these callouts, sync with your team, and you’ll soon be dominating the CS2 Vertigo map like a pro.