Smokes on Anubis CS2 can completely decide whether your team gets map control or gets locked out of sites all game. This guide breaks down the strongest, easiest, and most consistent Anubis smokes, with explanations simple enough that even newer players can follow.
Before learning the lineups, it helps a lot to review the CS2 Anubis callouts so you know exactly which areas each smoke covers.
Why Anubis Smokes Matter
Anubis is one of the most utility-heavy maps in CS2. Strong smokes help you:
- Win mid control
- Deny long CT angles
- Hit A and B cleanly
- Counter early CT aggression
- Lock down post-plants
Because Anubis features tight corridors and long canal sightlines, learning a few essential smokes will elevate your whole team.
If you’re studying multiple maps, you may also enjoy the CS2 Nuke Callouts and Vertigo callouts guides.
Before You Throw: Understanding Map Layout
For best results, learn your lineups using practice utilities. Try these guides if you need help:
If you’re newer to Counter-Strike, the CS2 beginner guide explains core fundamentals.
Best Anubis Smokes (Step-by-Step Lineups)
These are the most practical and match-winning smokes for Anubis.
1. A-Main to A-Heaven Smoke
Why use it?
Shuts down the strongest CT angle and makes A-site entries much easier.
Lineup Steps:
- Stand on the A-Main stairs.
- Aim at the top-left corner of the tall pillar.
- Jump-throw.
Result:
Heaven is fully covered, allowing a safe ramp push and default plant.
2. A-Main to A-CT Smoke
Pairs perfectly with the Heaven smoke.
Lineup:
- From A-Main, aim at the upper roof tile edge.
- Left-click throw.
Result:
Blocks the wide CT swing, reducing entry pressure.
If you’re learning multiple maps, the CS2 Dust 2 callouts guide is another great reference.
3. Mid Connector to A Smoke (Mid to Temple)
Lineup:
- Stand at mid top boxes.
- Aim at the bottom of the arch roof ornament.
- Left-click throw.
Result:
Blocks Temple players and allows safe mid advancement.
4. Mid to Window Smoke (Top Mid Smoke)
Lineup:
- Stand by the mid stairs.
- Aim at the center of the window frame.
- Jump-throw.
Result:
Prevents early CT peeks and stabilizes mid control.
If you like mastering mid fights, check CS2 peekers advantage.
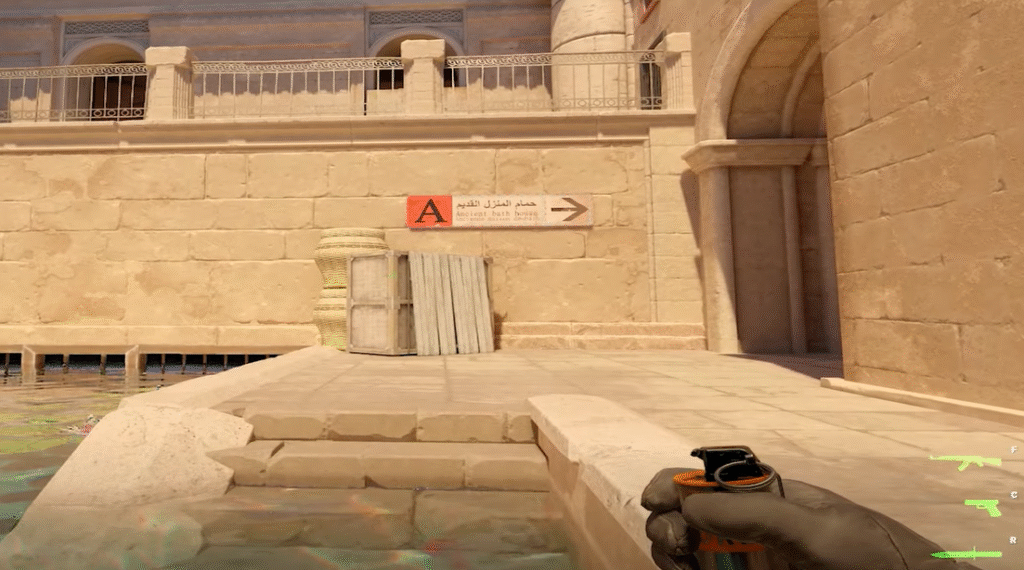
5. T-Spawn to B-Main Smoke
Lineup:
- From T spawn right side, find the hanging cloth.
- Aim at the left edge.
- Left-click throw.
Result:
Blocks B-Main aggression and lets Ts set up safely.
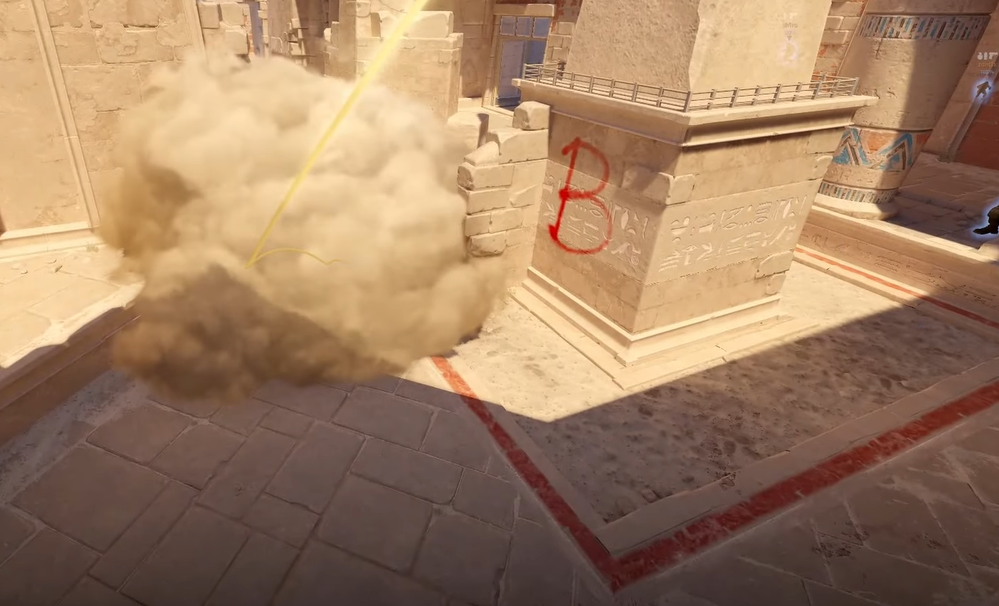
6. B-Main to B-Heaven Smoke (Essential!)
Lineup:
- Stand in B-Main corner.
- Aim at the statue’s helmet.
- Jump-throw.
Result:
Denies Heaven’s long angle — best smoke for B executes.
7. B-Main to B-CT Smoke
Lineup:
- Same B-Main corner.
- Aim at the center of the CT stone arch gap.
- Left-click throw.
Result:
Cuts off rotators, allows safe scaling onto site.
CT Defensive Smokes (Must Know for Holding Sites)
A-Main One-Way Smoke
- Stand by A pillar.
- Aim at the wooden plank gap.
- Left-click throw.
Result: Faster info with a one-way advantage.
Mid Smoke from Connector
- Stand in connector.
- Aim at the arch top.
- Throw.
Delays mid pushes and buys rotation time.
B-Main Delay Smoke
- From B-Heaven, aim at the doorway center.
- Left-click throw.
Great for shutting down fast Ts.
Quick Reference Table
| Situation | Smokes Needed | Benefit |
| Full A Execute | A-Heaven, A-CT | Safe ramp scaling |
| Split A | Mid-Window, Mid-Temple | You pinch the site |
| Full B Execute | B-Heaven, B-CT | Safest B entry |
| Mid Control | Mid-Window, Mid-Temple | Deny early CT picks |
| Anti Aggression | T-Spawn to B-Main | Stops early fights |
To understand timings better, the CS2 economy guide helps explain why certain rounds require utility saves or heavy buys.
Tips to Improve Your Smoke Consistency
Use a jump-throw bind
Essential for Heaven, Window, and long-range lineups.
Guide: Jump-throw bind CS2
Practice offline
Use CS2 smoke practice commands to save time.
Pair smokes with good flashes
Pop-flashing through B-Main or A-Main drastically increases hit success.
Know your timings
Pairing rotations with correct site executes is similar to managing rounds in the CS2 economy.
Frequently Asked Questions (FAQs)
1. What are the most important Anubis smokes in CS2?
The essential Anubis smokes are A-Heaven, A-CT, Mid to Temple, Mid to Window, B-Heaven, and B-CT. These six smokes cover every major execute and give you safe map control.
2. How do you smoke A-Heaven from A-Main?
Stand on the A-Main stairs, aim at the top-left corner of the tall pillar, and jump-throw. This fully blocks Heaven and makes A-site entries much safer.
3. What smokes do I need for a full A-site execute on Anubis?
You should throw A-Heaven and A-CT. These two smokes deny the strongest CT angles and let your team scale ramp and plant safely.
4. What’s the best smoke to take Mid control on Anubis?
The two most reliable mid-control smokes are Mid to Window and Mid to Temple. Together, they block early CT peeks and allow Ts to scale mid confidently.
5. How do I smoke B-Heaven from B-Main?
Stand in the back-left B-Main corner, aim at the statue’s helmet, and jump-throw. This smoke is mandatory for safe B executes.
Final Thoughts
Mastering Anubis smokes CS2 doesn’t require dozens of complicated lineups — just these core throws. Once you learn the basics, Anubis becomes one of the most fun maps to execute on.