If you’ve ever missed a “must-land” smoke by a pixel, you already know why the jump throw bind is one of the most important binds in CS2.
This guide will show you exactly how to bind jump throw in CS2, explain why it matters, and help you fix common issues — all in a gamer-friendly, no-BS way.
Whether you’re grinding Premier or learning lineups on Mirage, this is a must-have setup.
What Is a Jump Throw Bind in CS2?

A jumpthrow bind lets you jump and release a grenade at the exact same tick, making your throws consistent every time.
In CS2, manual jump throws are unreliable because:
- Sub-tick timing is stricter
- Human input is inconsistent
- Small delays = missed smokes
A proper cs2 jumpthrow bind solves all of that.
Is Jump Throw Bind Allowed in CS2?
Yes.
Jumpthrow binds are 100% legal in CS2 matchmaking, Premier, and Faceit.
Valve removed the old in-game alias command, but keybind-based jump throws still work and are widely used — even by pros.
How to Bind Jump Throw in CS2 (Working Method)
This is the current and reliable method used by most players.
Step 1: Open the CS2 Console
If your console isn’t enabled:
- Settings → Game → Enable Developer Console
Open it using the ~ key.
Step 2: Paste This Jumpthrow Bind Command
alias “+jumpthrow” “+jump;-attack”
alias “-jumpthrow” “-jump”
bind “V” “+jumpthrow”
Replace V with any key you prefer.
This command ensures:
- Jump happens first
- Grenade releases at the same tick
- Maximum consistency
Best Key to Use for Jumpthrow Bind
Most players use:
- V
- C
- Mouse4 / Mouse5
Tip: Don’t bind it to Space. You want normal jumping and jump throwing to stay separate.
If you’re optimizing binds, also check out this complete CS2 binds guide for movement and utility setups.
How to Test If Your Jumpthrow Bind Works
- Load a practice map
- Enable grenade trajectory
- Throw the same smoke 3–4 times using the bind
If the grenade lands in the exact same spot every time, your bind is working perfectly.
For practice setups, you’ll want these CS2 practice commands to speed things up.
Why Jump Throw Binds Matter So Much in CS2
Here’s what you gain instantly:
- Pixel-perfect smokes
- Consistent lineup results
- Faster executes
- Less mechanical effort under pressure
This is especially important on maps like:
If you’re learning lineups, pairing this with proper CS2 custom maps makes a massive difference.
Jump Throw Bind vs Manual Jump Throw
| Method | Consistency | Difficulty |
| Manual jump throw | Inconsistent | Medium |
| Jumpthrow bind CS2 | Perfect | Easy |
Manual throws can work, but under pressure, binds win every time.
Common Jumpthrow Bind Problems (And Fixes)
Bind Doesn’t Work
Fix:
Make sure:
- Console is enabled
- No conflicting binds exist
- You pasted both alias lines
Grenade Drops Too Early
Fix:
You may be releasing mouse1 too soon. Hold mouse1 before pressing the bind key.
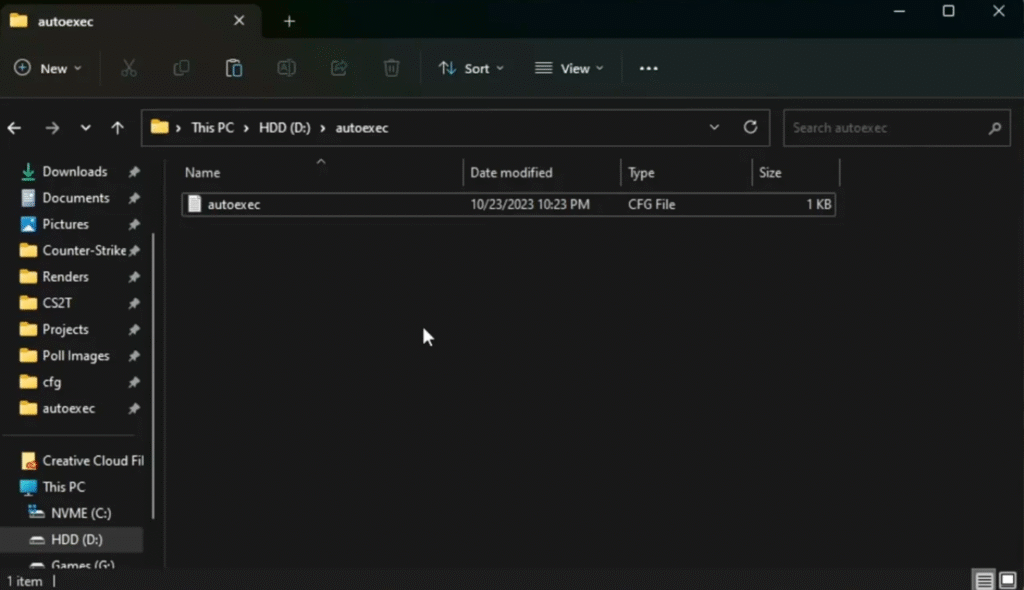
Bind Resets After Restart
Fix:
Add the commands to your autoexec file.
If you don’t have one yet, follow this CS2 autoexec guide.
Pro Tip: Learn Lineups the Right Way
A jumpthrow bind is only as good as your positioning. Combine it with:
- Map callout knowledge (for precise setups)
- Smoke practice servers
- Repetition
Start with Mirage and Inferno since they rely heavily on jump throws:
- Learn standard positions
- Memorize visual references
- Re-throw until muscle memory kicks in
Is Jump Throw Bind Required to Rank Up?
Not required — but highly recommended.
If you want to climb faster:
- Consistent utility > flashy aim
- Good smokes win rounds
- Bad smokes lose games
Pair this with smart utility usage and your climb through CS2 ranks becomes much smoother.
Final Thoughts
The jump throw bind in CS2 is one of those “set it once, benefit forever” tweaks.
It’s legal, reliable, and absolutely essential if you care about consistent utility.
If you’re serious about improving:
- Set up the bind
- Practice with it
- Never miss an important smoke again